


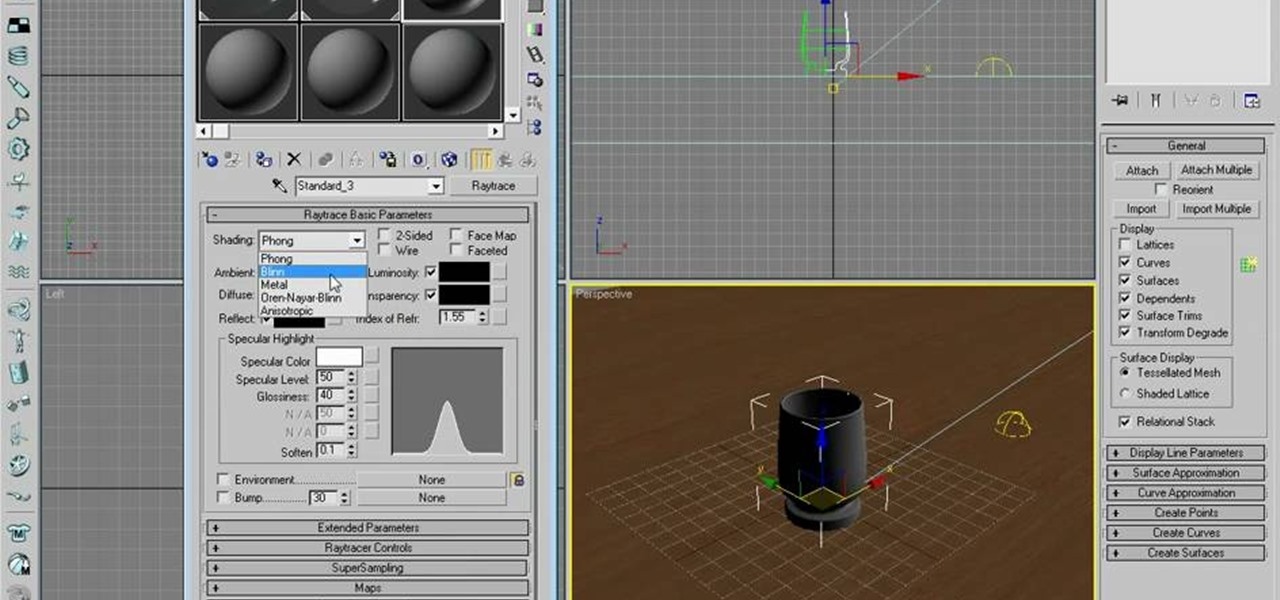
How To: Create glass material in 3ds Max
Dave shows you how to produce a glass three different ways in 3ds Max in the video tutorial. Put two panels away, then concentrating on sensor one press m on the keyboard to bring up the materials editor. On the material editor go to the first sphere, choosing a slight blue color, bring up the specter level, bring up the glossy level, click on two sided and bring down the last two to about four. Look to see it is fairly transparent, in a test window. This is glass one, put on hide. Go to glas...

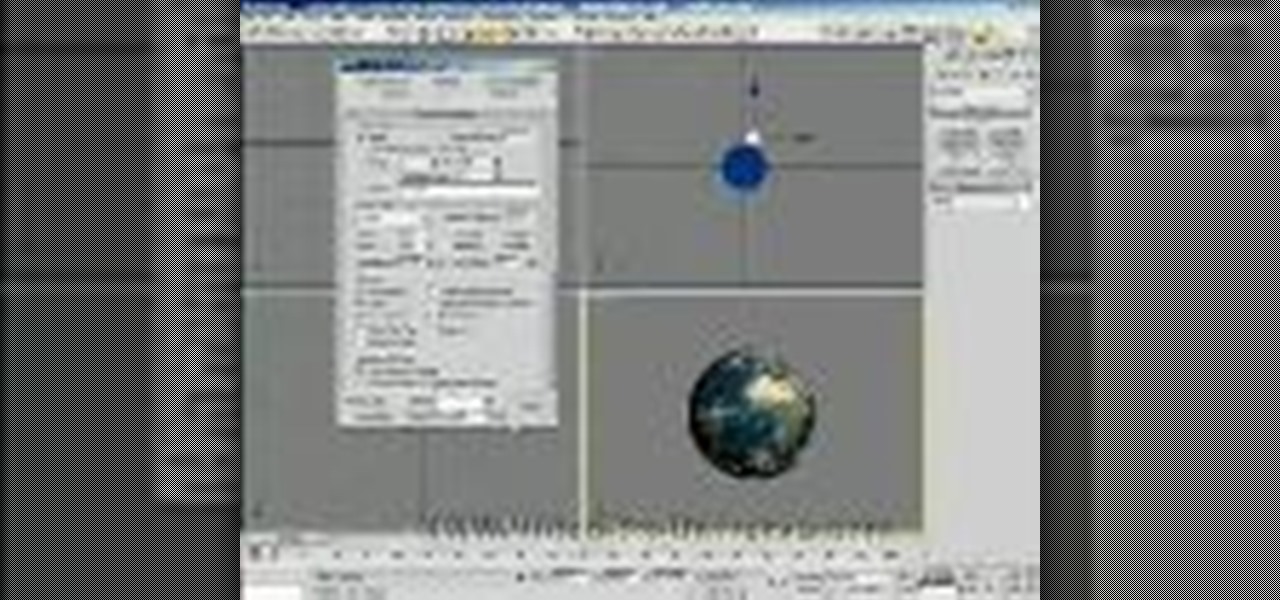
How To: Create planet earth in 3ds Max
This three part 3D Studio Max tutorial will show you how to build and texture a realistic looking earth and moon.
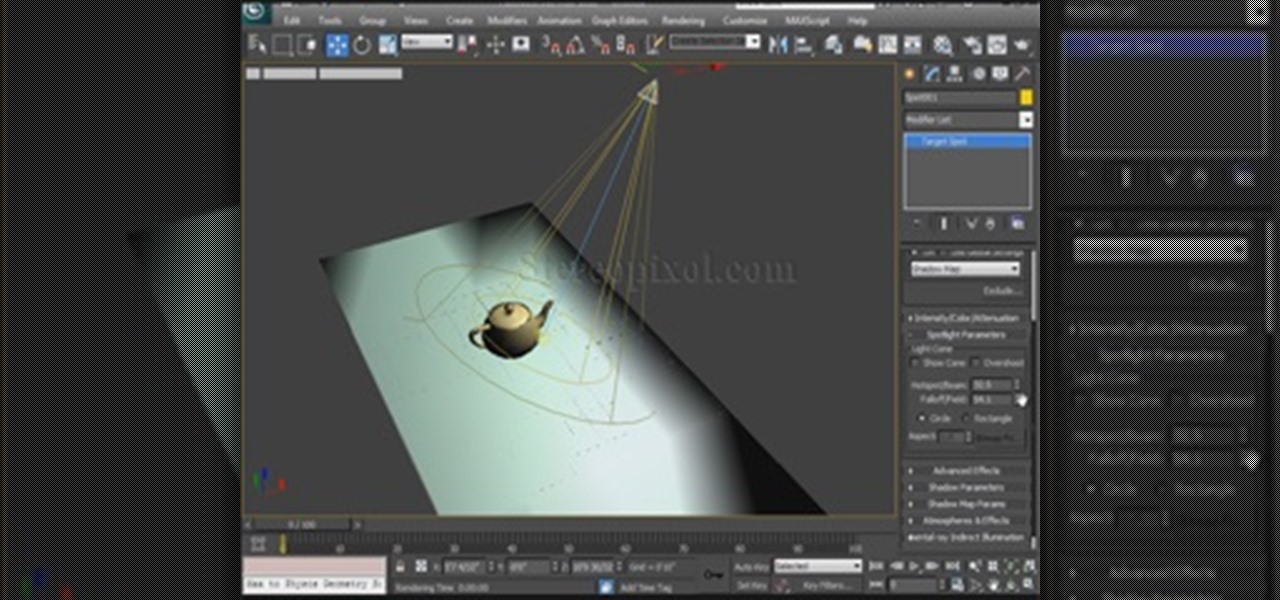
How To: Use Spotlight in Autodesk 3ds Max 2014
This 4th Chapter of Lights in Autodesk 3Ds max is fully concentrated on spot light. We will learn about the various spot light parameter of 3ds max like, Hotspot/Beam and falloff, then how to use overshoot or its limitations, how we can make the spotlight rectangular than circuler and many more. Hope you will enjoy.
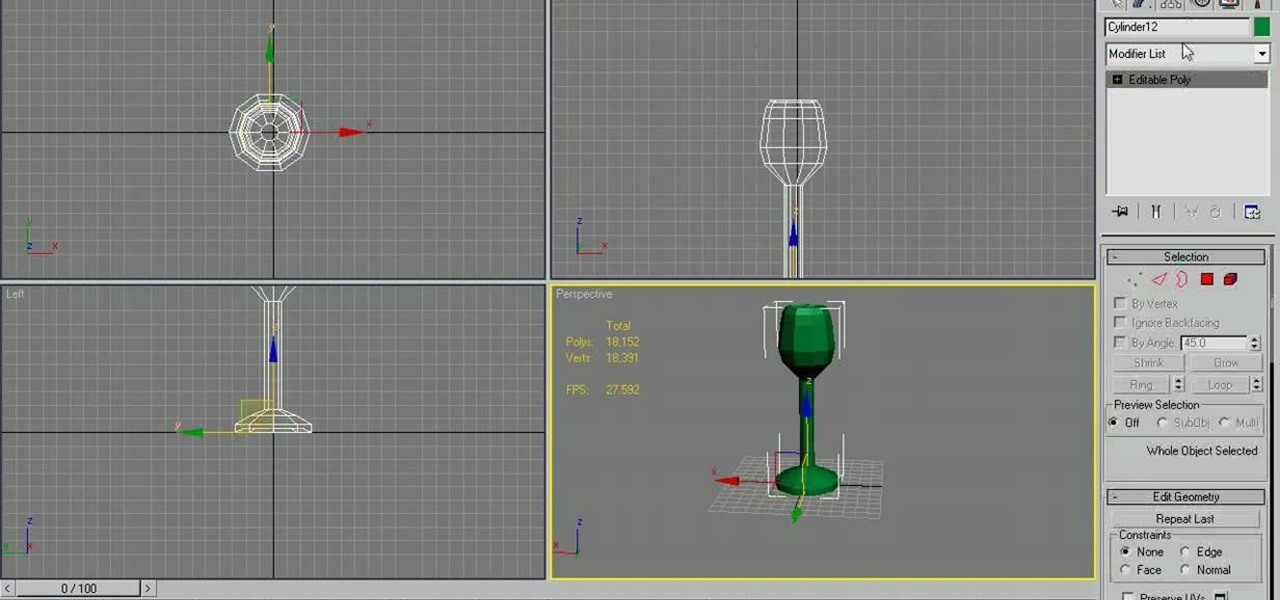
How To: Model a long-stemmed wine glass in Autodesk 3ds Max
In the need of a animated wine glass for your next animation masterpiece? If you have Autodesk 3ds Max, it can be done. As long as you follow the techniques used in this video tutorial on modeling a long-stemmed wine glass in 3ds Max. It's actually a simple design, just enough to get you going on a more detailed, custom design.
How To: Blow up a planet using particle array in Autodesk 3DS Max
Make a whole planet explode! This two-part tutorial series shows you how to use the particle array function in Autodesk 3DS Max to create the animation of a whole planet blowing up. Good for film makers or video game artists!
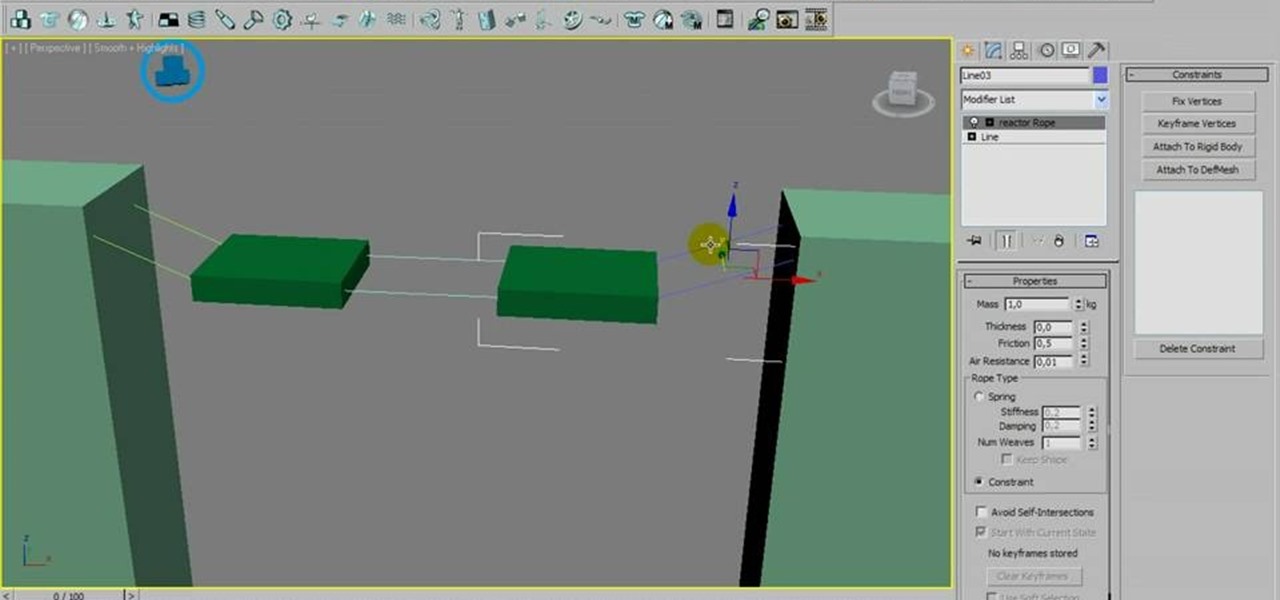
How To: Create a realistic rope bridge using Autodesk 3ds Max
If you're creating a rope bridge, you'll want to make it as dynamic as possible. This tutorial shows you how to use a couple tools in Autodesk 3ds Max to make sure that your rope bridge is realistic when you use it in animation.
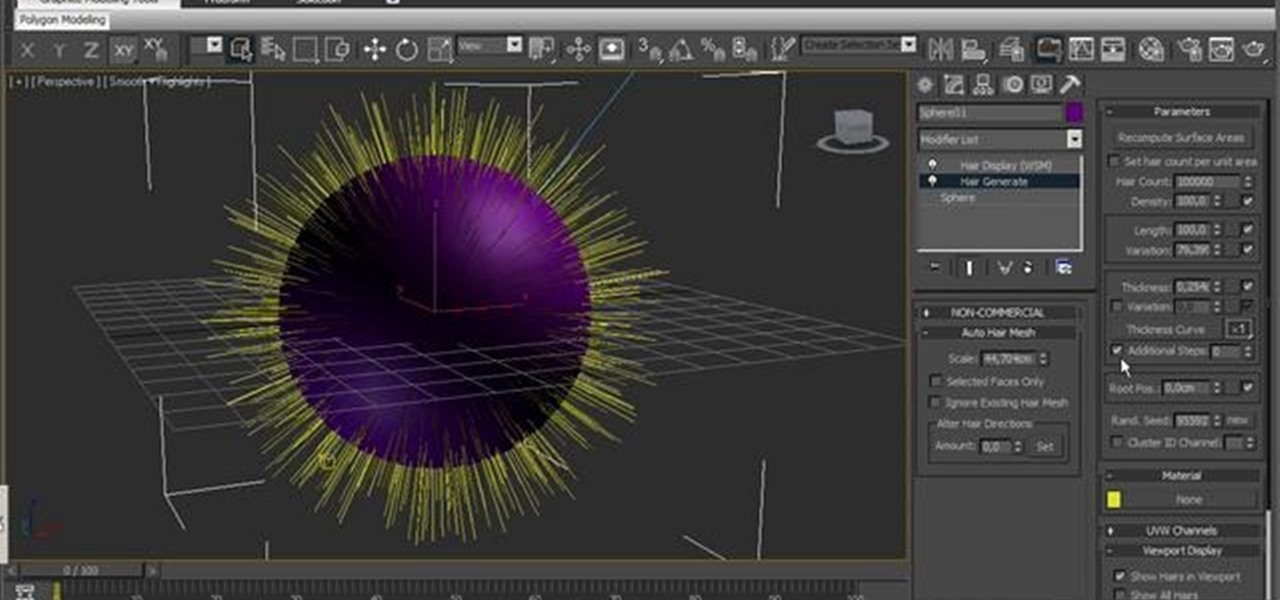
How To: Use the Hairfarm hair-modeling plugin with 3ds Max 2010
In this clip, you'll learn how to use the Hairfarm plugin in your 3ds Max projects. Whether you're new to Autodesk's popular 3D modeling program or a seasoned graphic artist just interested in better acquainting yourself with the application, you're sure to be well served by this free video tutorial. For more information, including detailed instructions, take a look.
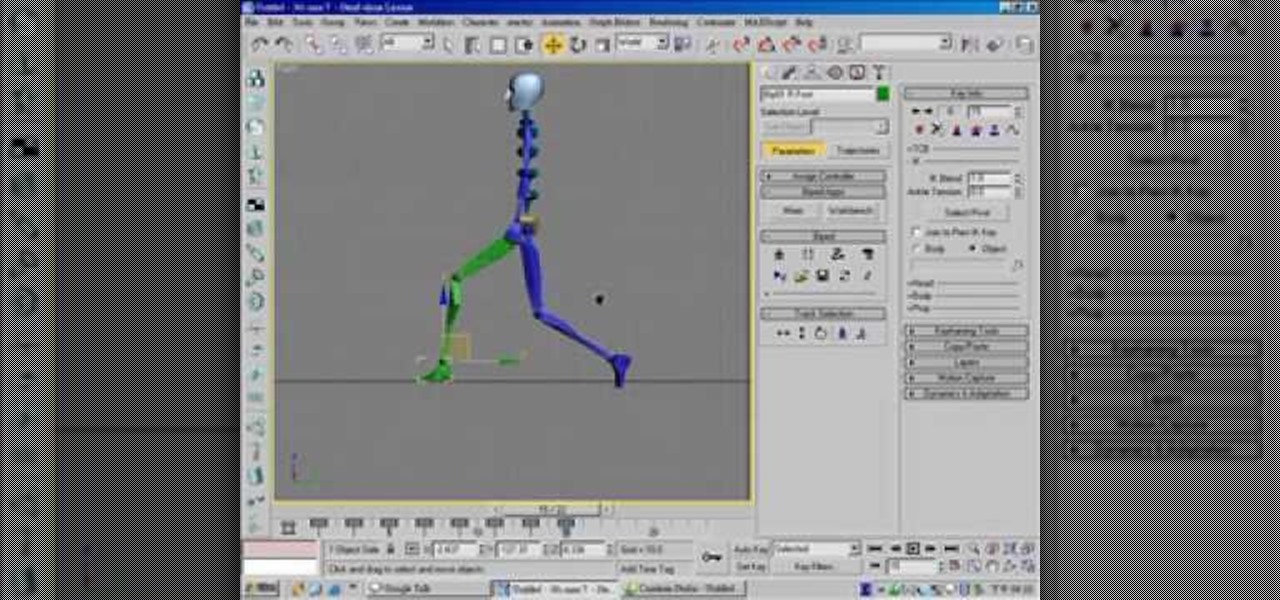
How To: Animate a basic walk cycle for a biped in 3ds Max
Making a 3D model bipedal character walk is one of the most basic and necessary things that you can do to them. If you are going to use them in a movie or game, chances are they will have to move themselves from one place to another right? This video will teach you how to create a basic walk cycle for one of your bipeds in 3D Studio MAX, allowing you to animate them walking to all kinds of places quickly and easily.
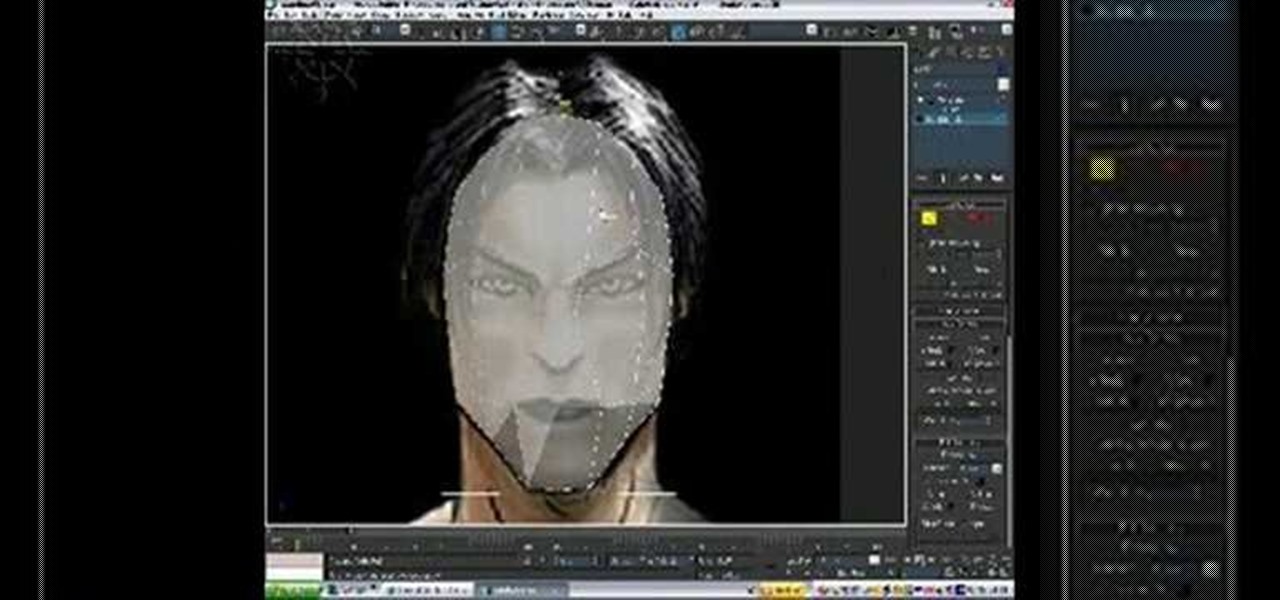
How To: Create a head model in 3ds Max
Creating 3D models of the human head that will show emotion, eat, and do all the other things that heads do properly is hard. Fortunately, this video is here to help you get started. It demonstrates the basics of 3D head modeling using 3D Studio MAX. Follow these instructions and you'll be well on your way to creating all sorts of cool original character heads.
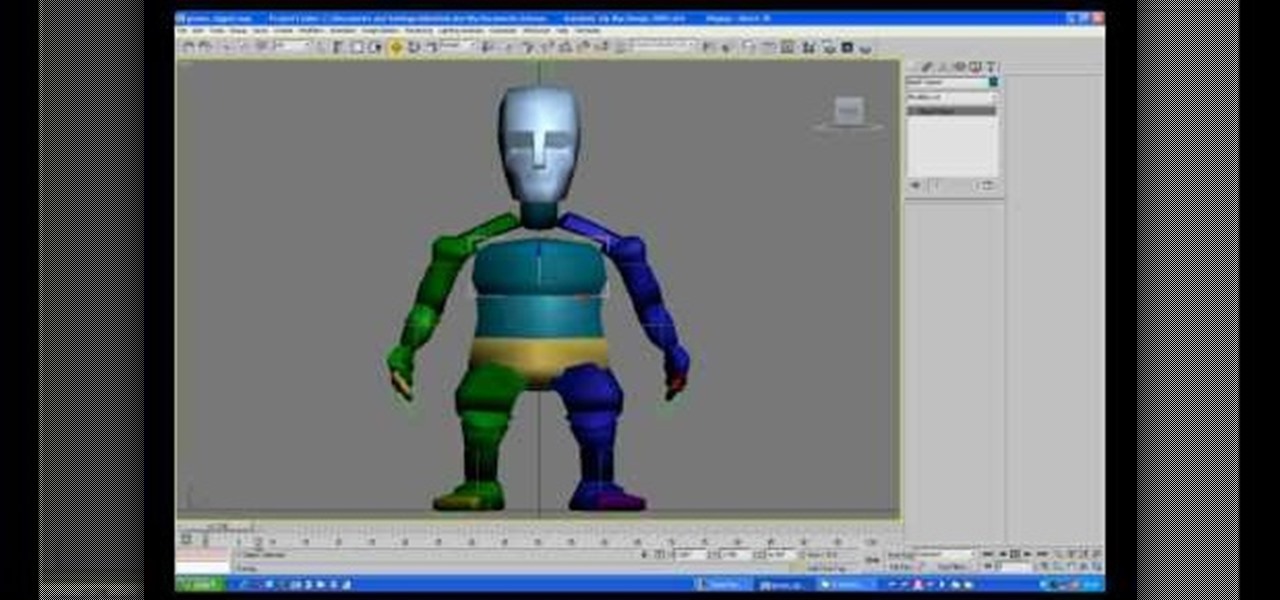
How To: Use Biped to do motion capture in 3DS Max
Causing World of Warcraft characters to do what you want them to do in your machinima film can be a major challenge. Motion capture is one useful tool that you can use to solve the problem. This video will teach you the basics of using the Biped plugin for 3DS Max to animate WoW characters with motion capture data. Give your models the realistic stride that they've deserved all along.
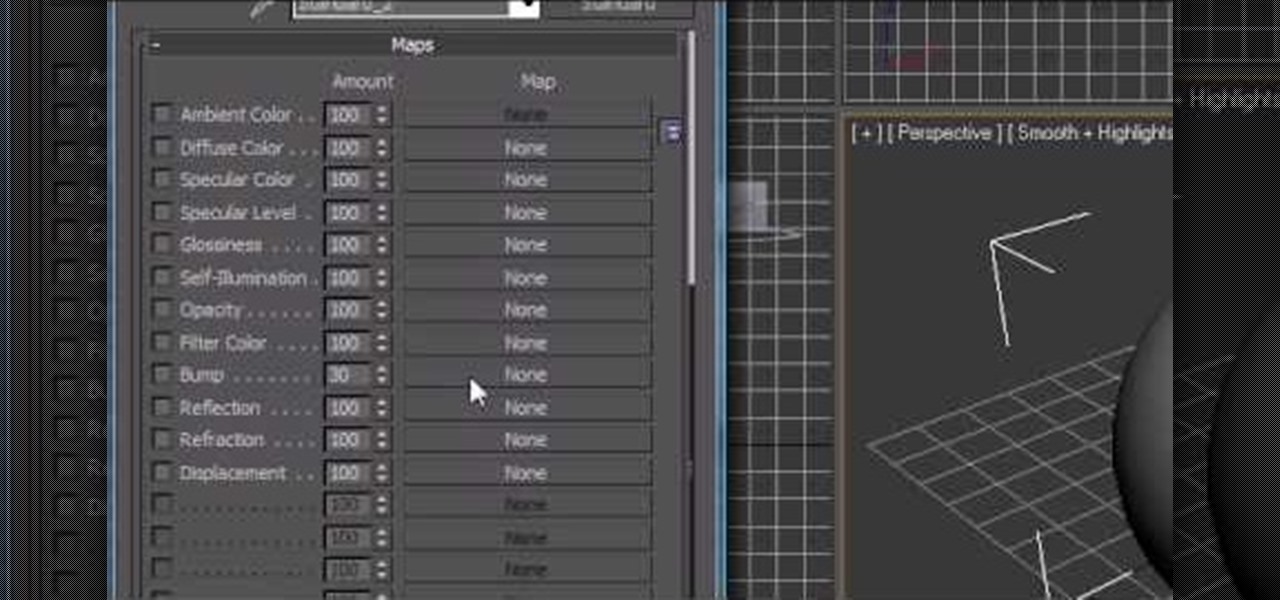
How To: Apply maps to an object in 3Ds Max
Just getting started using the program 3d Studio Max? Luckily, WonderHowTo is full of video tutorials on the program to help get you started. In this video, learn how to apply maps to an object in 3ds Max.
How To: Use edit poly modifiers to animate in 3ds Max
This 3D software tutorial shows you how to work with editable polys in animate mode in 3ds Max. The idea is to use edit poly modifiers to control and have selections active when working in 3D Studio Max. See how to use modifiers like features in 3ds Max, a parametric modeling software. Learn how to use parameters to store design intent and avoid having to remodel geometry in Max. The tutorial is best viewed full screen. Use edit poly modifiers to animate in 3ds Max.
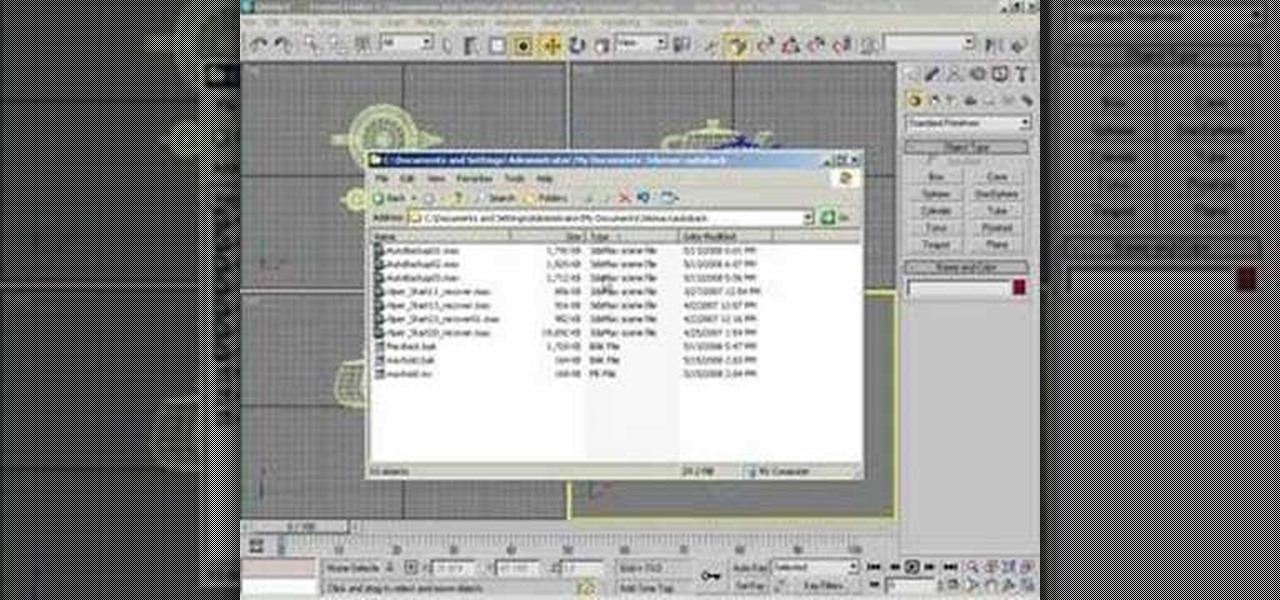
How To: Hold and fetch a scene in 3ds Max
This tutorial shows you how to hold and fetch a scene in 3D Studio Max. This is very similar to a quickly saved file but without actually saving it.
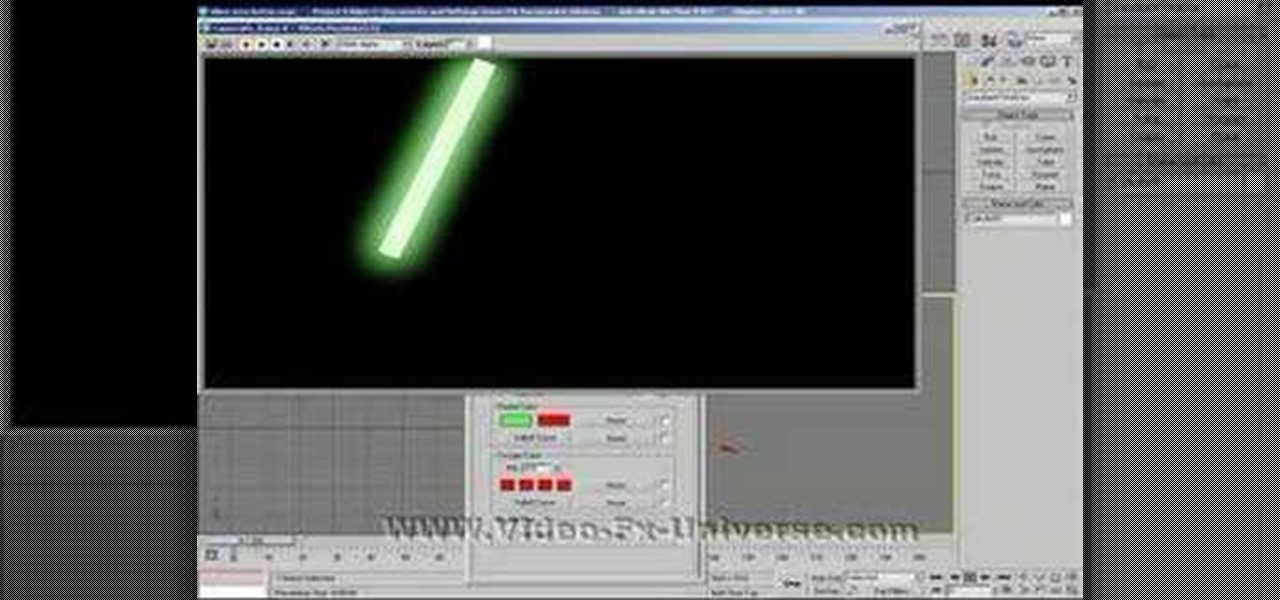
How To: Create laser blasts in 3ds Max 9
Why make a boring 2D laser in After Effects or Photoshop when you can make a real 3D one in 3D Studio Max? This tutorial shows you how to create these shooting lasers (also works for light sabers).
How To: Join two polygons with the bridge tool in 3ds Max
3ds Max lets you use 2D shapes as the cross sections of 3D models. In this 3d Max video tutorial you will learn how to do this using the polygon bridge weld too. Basically, this bridge tool lets you join two polygons. Make sure to hit "play tutorial" in the top left corner of the video to start the video. There is no sound, so you'll need to watch the pop-up directions. Join two polygons with the bridge tool in 3ds Max.
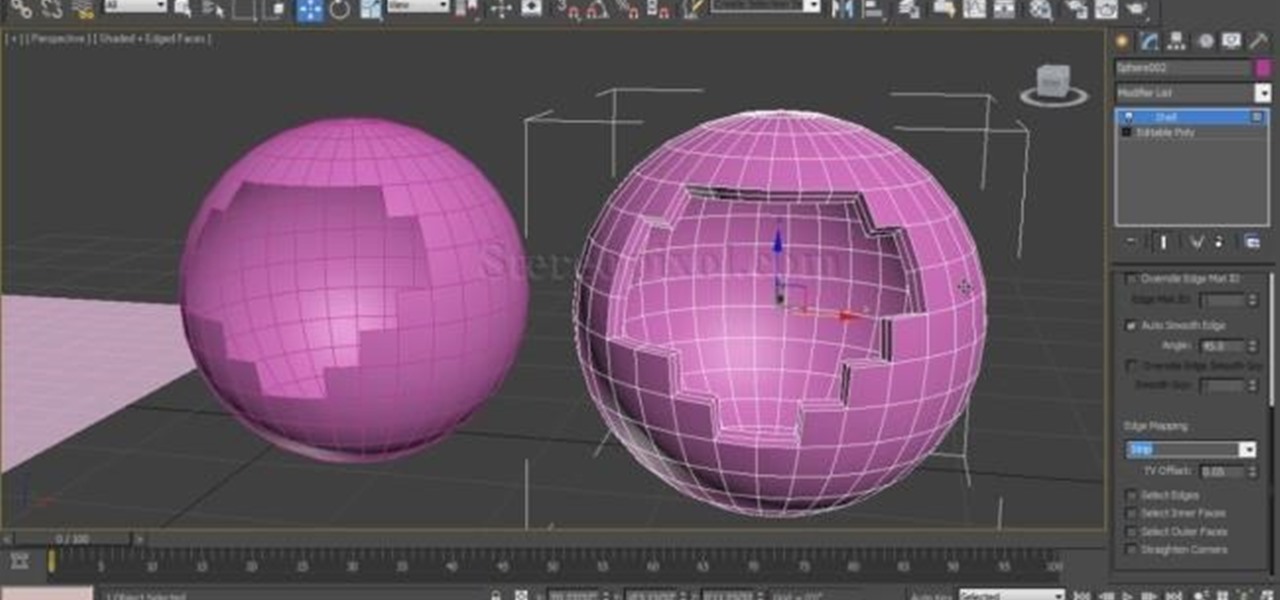
How To: Use Shell Modifier in 3Ds Max
Shell modifier is very useful to give a thickness in your model you make in Autodesk 3Ds Max. but the use of the modifier not only limit to giving thickness . you can make design around those thickness also. Go through the video to know more in details.

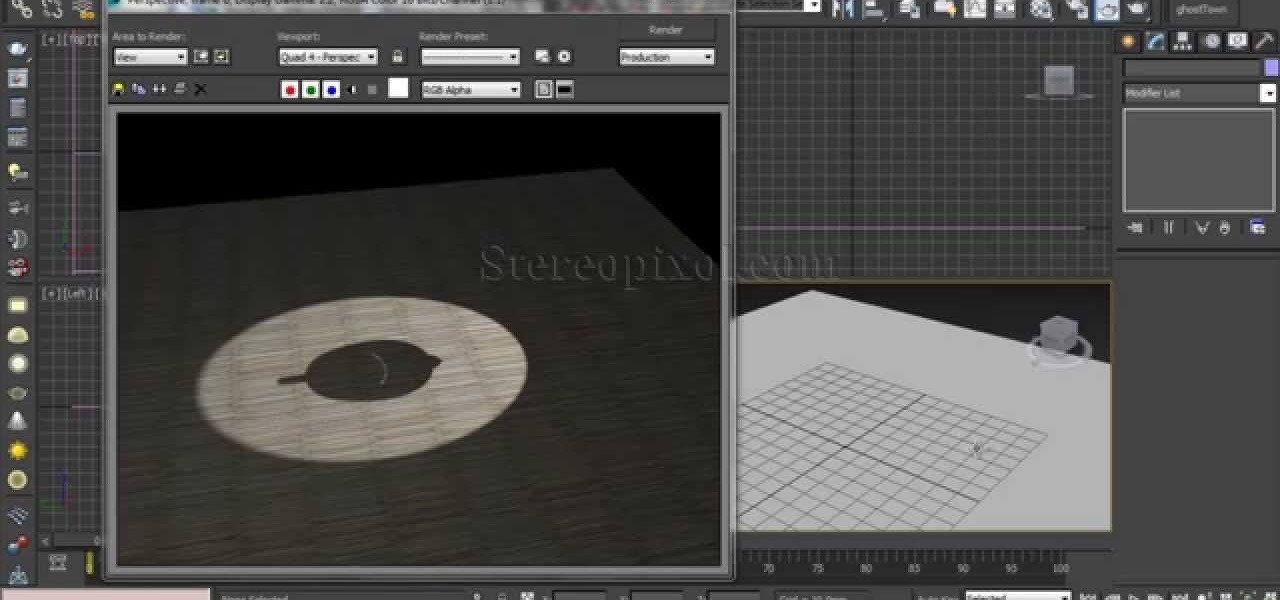
How To: Use Advance Effects Role Out in Autodesk 3Ds Max
Welcome to the 5th Chapter of the Lighting series in 3Ds Max. In this tutorial, you are going to learn about the Advance effect roll out in almost every lights in 3ds max. In the tutorial we have covered different option like contrast, soften edge, projector map etc. Hope you will enjoy this. Lights In Autodesk 3Ds Max – Chapter 05 | Stereopixol.
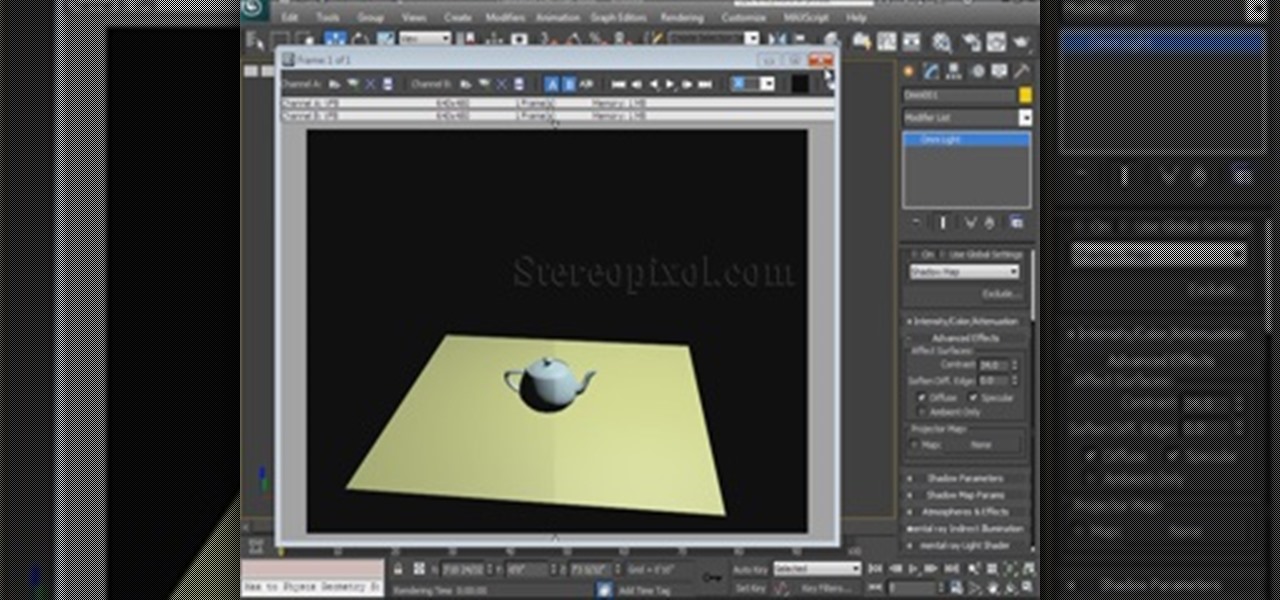
How To: Use Advanced Lighting Effects in Autodesk 3ds Max 2014
Welcome to the 5th Chapter of the Lighting series in 3Ds Max. In this tutorial, you are going to learn about the Advance effect roll out in almost every lights in 3ds max. In the tutorial we have covered different option like contrast, soften edge, projector map etc. Hope you will enjoy this.
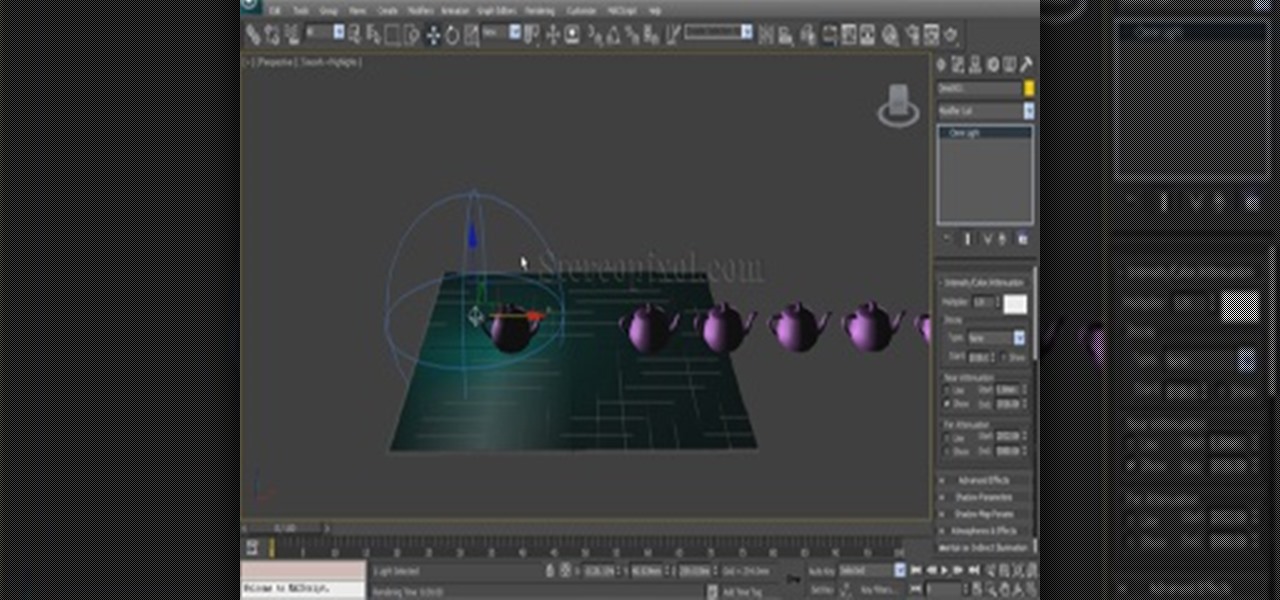
How To: Use Attenuation in Autodesk 3ds Max 2014
Hello and welcome to the 3rd Chapter of the Lights in 3Ds Max. In this chapter we are going to discuss about the attenuation of the lights. There are two kind of attenuation are out there in 3Ds Max , Near and Far , we will learn about the theory behind the attenuation and learn how to use them. Hope you will enjoy.

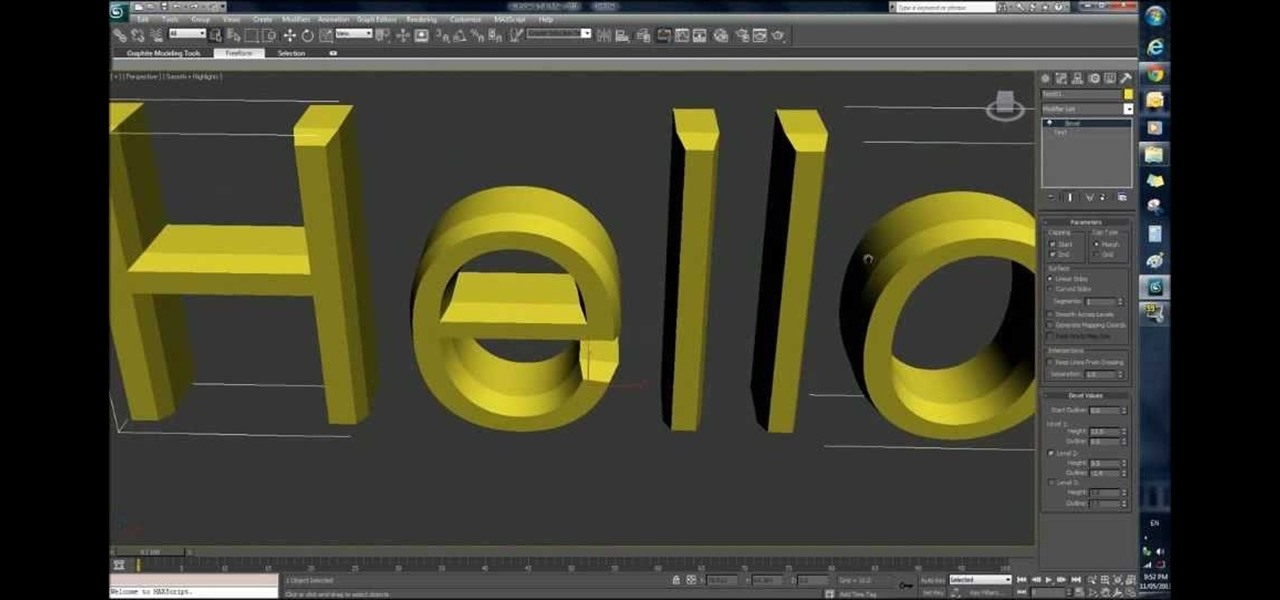
How To: Create and Render a Intro Title Using 3Ds Max
Video: . Do you have a problem in figure how to create an amazing title? Here is the tutorial for you. By using 3Ds Max software, the video illustrates you step by step how to make a cool title for an intro of a video and how to render it obviously!
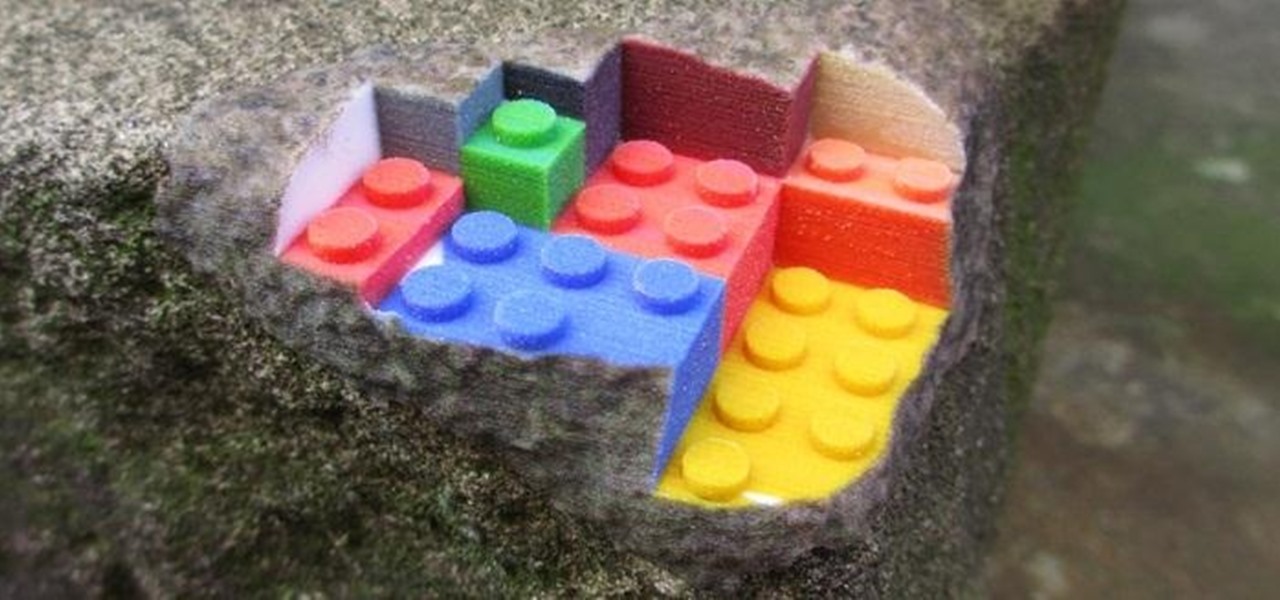
Street Art Tricks: How to Blend 3D Prints into Real-Life Objects
While graffiti may never be fully accepted by the masses, it has already become a very large medium for creative artists across the globe, who make mundane and austere cityscapes a little more interesting for the rest of us. Walking past this Banksy stencil on my way to class (at UCLA) made my day. Art like this can cause people to stop and appreciate the otherwise boring and blank walls that surround the city. It can stir up artistic feelings, pensive thoughts, and other emotions stored insi...

How To: Make a rotating text watermark with 3ds Max
Watermarks are essential for branding your online creations, but you may not always want a static image. If you're looking to create a rotating text or graphic logo, this tutorial is for you. Using 3D Studio Max, learn how to put your brand in motion!
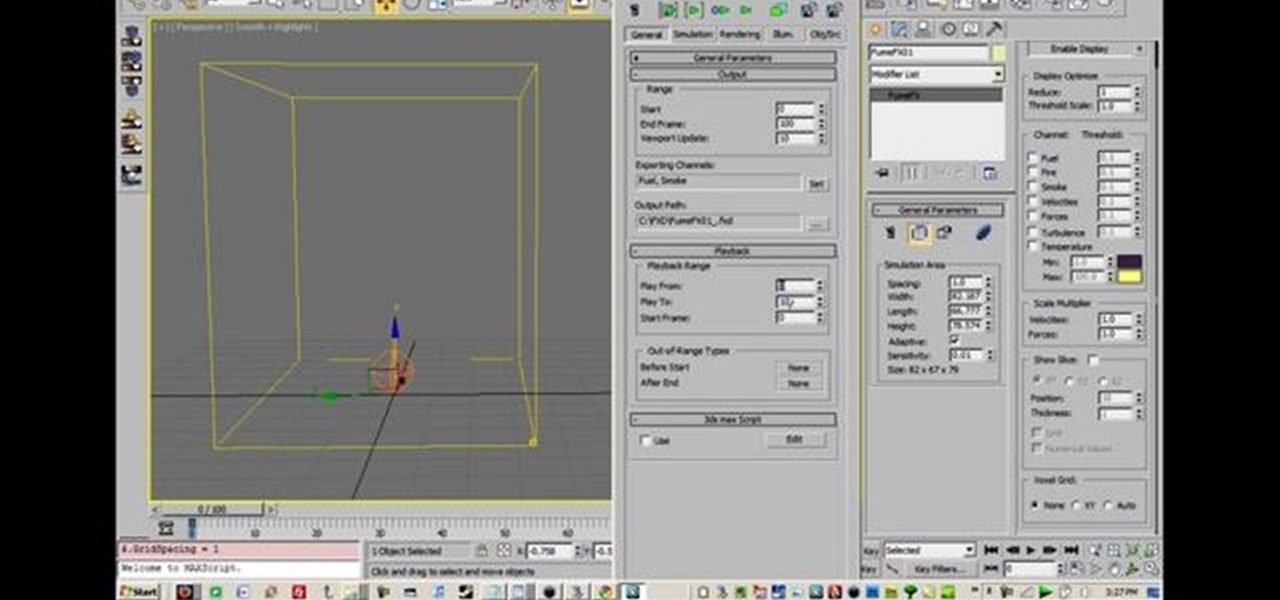
How To: Create fire, smoke and explosion effects using computer visual effects
This tutorial will work for most any 3D rendering program, such as Houdini, 3ds Studio Max or Maya. Learn how you can replicate the dynamic look of fire, smoke and explosions. Create digital fire and other fume effects with your computer.
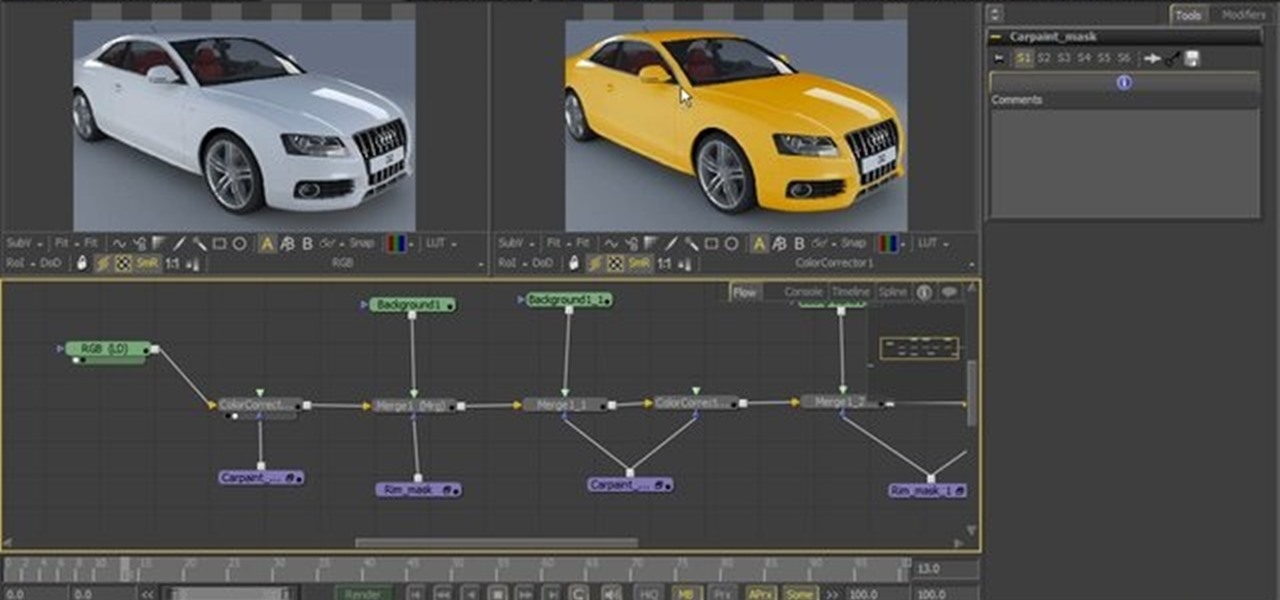
How To: Generate mattes and masks in 3ds Max and V-Ray
This tutorial shows you how you can generate mattes and masks to use in 3-D compositing. The video shows you which render elements to use for greatest effects for your project, such as changing the color of paint on a car.
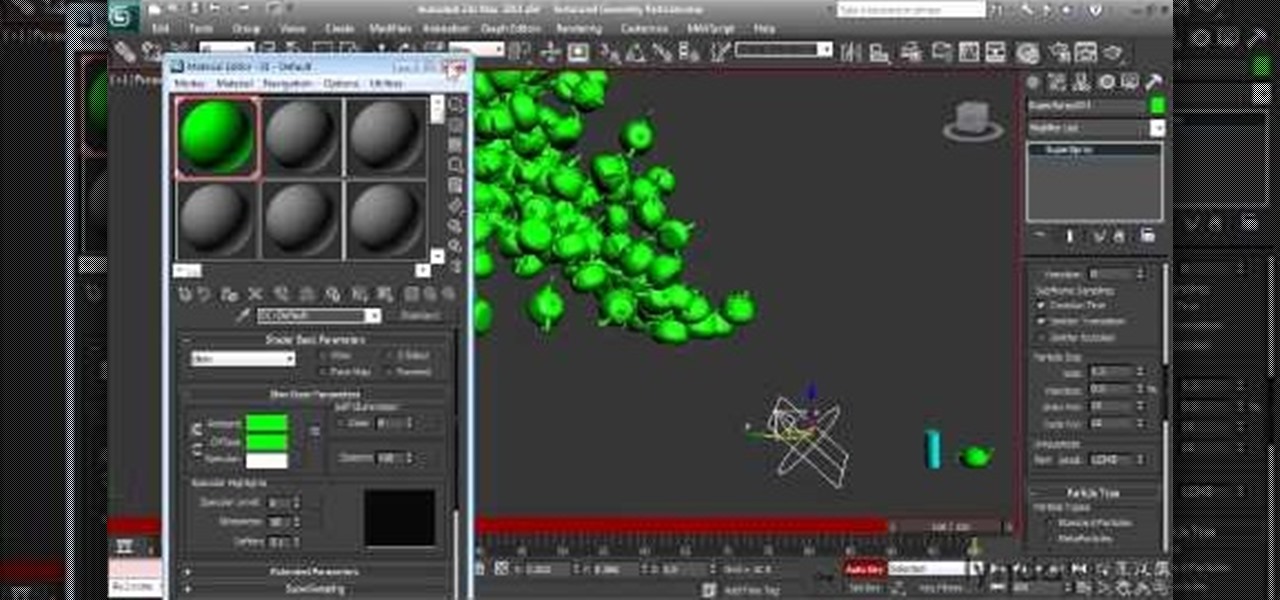
How To: Create particle effects in Autodesk 3ds Max 2011
Learn how to use generate eye-catching particle effects within Autodesk 3ds Max 2011. Whether you're new to Autodesk's popular modeling software or a seasoned 3D artist just looking to better acquaint yourself with the application, you're sure to be well served by this video tutorial. For more information, and to get started creating particle effects in Autodesk 3ds Max 2011, take a look!
How To: Create a realistic model of a modern lamp in Autodesk 3ds Max 2011
In this video tutorial, we learn how to use create a realistic model of a modern lamp in 3ds Max 2011. Whether you're new to Autodesk's popular modeling software or a seasoned 3D artist just looking to better acquaint yourself with the 3ds Max 2010 workflow, you're sure to be well served by this video tutorial. For more information, and to get started using the lessons imparted by this free video software tutorial yourself, watch this free video guide.
How To: Configure the Ribbon UI in Autodesk 3ds Max 2011
In this video tutorial, we learn how to configure the Ribbon UI within Autodesk 3ds Max 2010. Whether you're new to Autodesk's popular modeling software or a seasoned 3D artist just looking to better acquaint yourself with the 3ds Max 2010 workflow, you're sure to be well served by this video tutorial. For more information, and to get started using the lessons imparted by this free video software tutorial yourself, watch this free video guide. Configure the Ribbon UI in Autodesk 3ds Max 2011.
How To: Create a 3D shadow matte in 3ds Max
In this tutorial, we learn how to create a 3D shadow matte in 3ds Max. If you have a scene where you need a realistic looking background, you can trick doing this by using 3ds Max. First, go up to the rendering and go to environment. Add an environment map and then click on bitmap and find the image that you want to use. From here, make sure your map is highlighted, then right click and show the background. If you render this out, you will have a picture of the background you want. After this...
How To: Use the point cache modifier in Autodesk 3ds Max 2010
In this video tutorial, we learn how to use the point cache modifier within Autodesk 3ds Max 2010. Whether you're new to Autodesk's popular modeling software or a seasoned 3D artist just looking to better acquaint yourself with the 3ds Max 2010 workflow, you're sure to be well served by this video tutorial. For more information, and to get started using the lessons imparted by this free video software tutorial yourself, watch this free video guide. Use the point cache modifier in Autodesk 3ds...
How To: Create a swirling vortex effect in Autodesk 3ds Max
In this video tutorial, we learn how to create a swirling vortex effect within 3ds Max. Whether you're new to Autodesk's popular modeling software or a seasoned 3D artist just looking to better acquaint yourself with the 3ds Max 2011 workflow, you're sure to be well served by this video tutorial. For more information, and to get started using the lessons imparted by this free video software tutorial yourself, watch this free video guide.
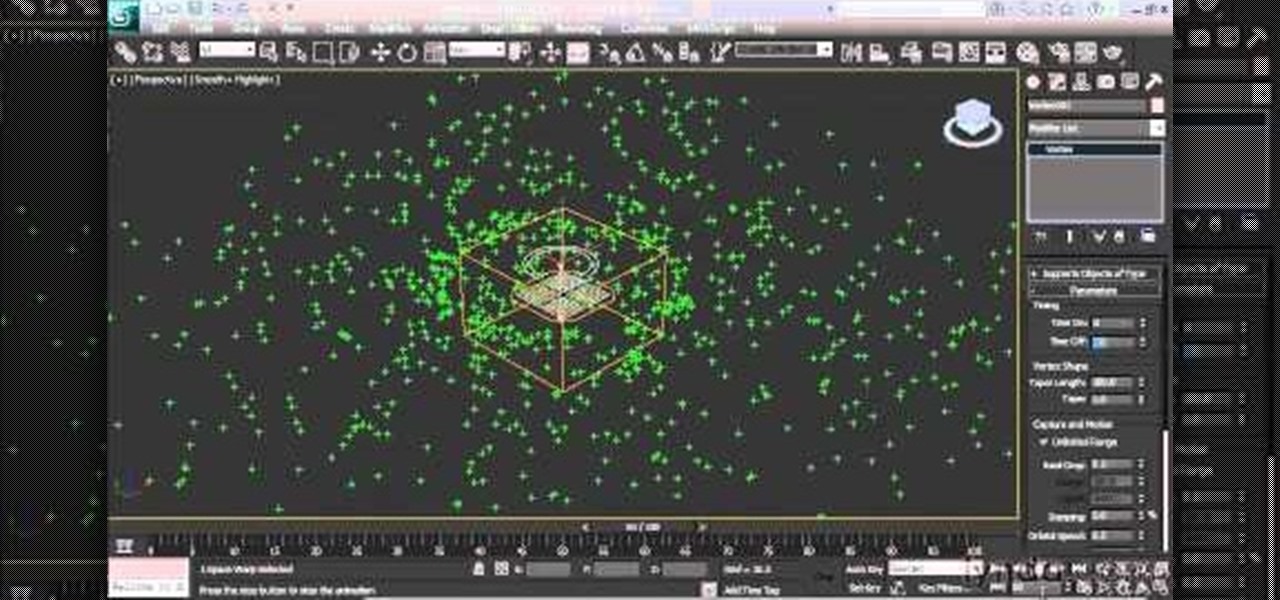
How To: Add gravity to an effect in Autodesk 3ds Max 2011
In this video tutorial, we learn how to imbue an effect with gravity in 3ds Max. Whether you're new to Autodesk's popular modeling software or a seasoned 3D artist just looking to better acquaint yourself with the 3ds Max 2011 workflow, you're sure to be well served by this video tutorial. For more information, and to get started using the lessons imparted by this free video software tutorial yourself, watch this free video guide.
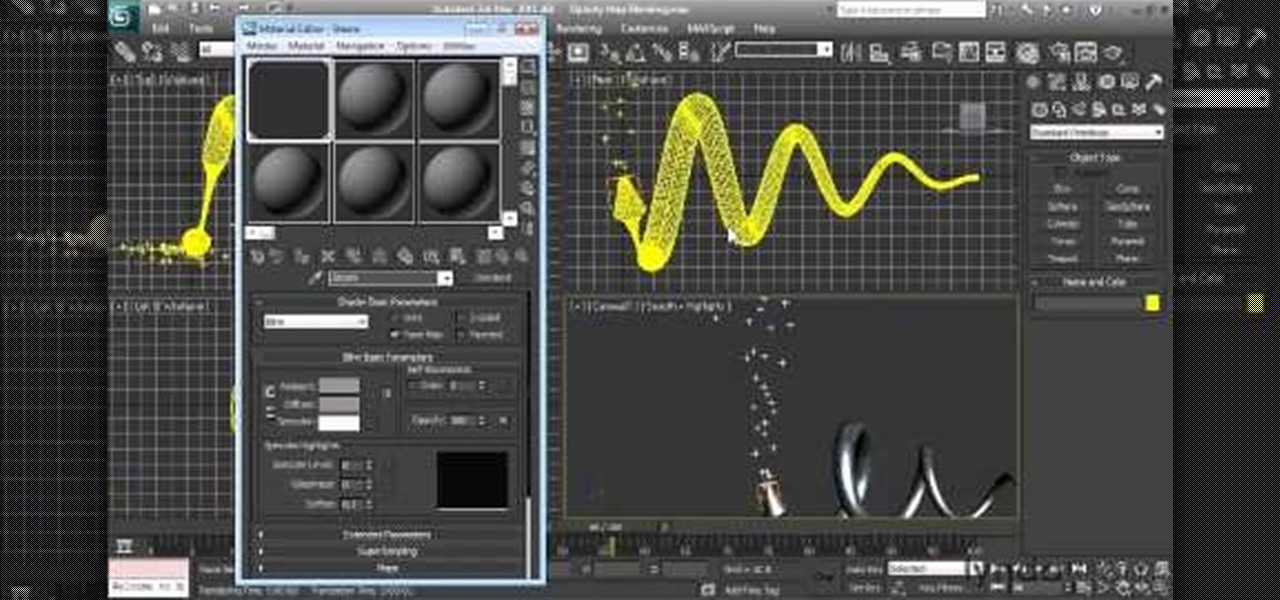
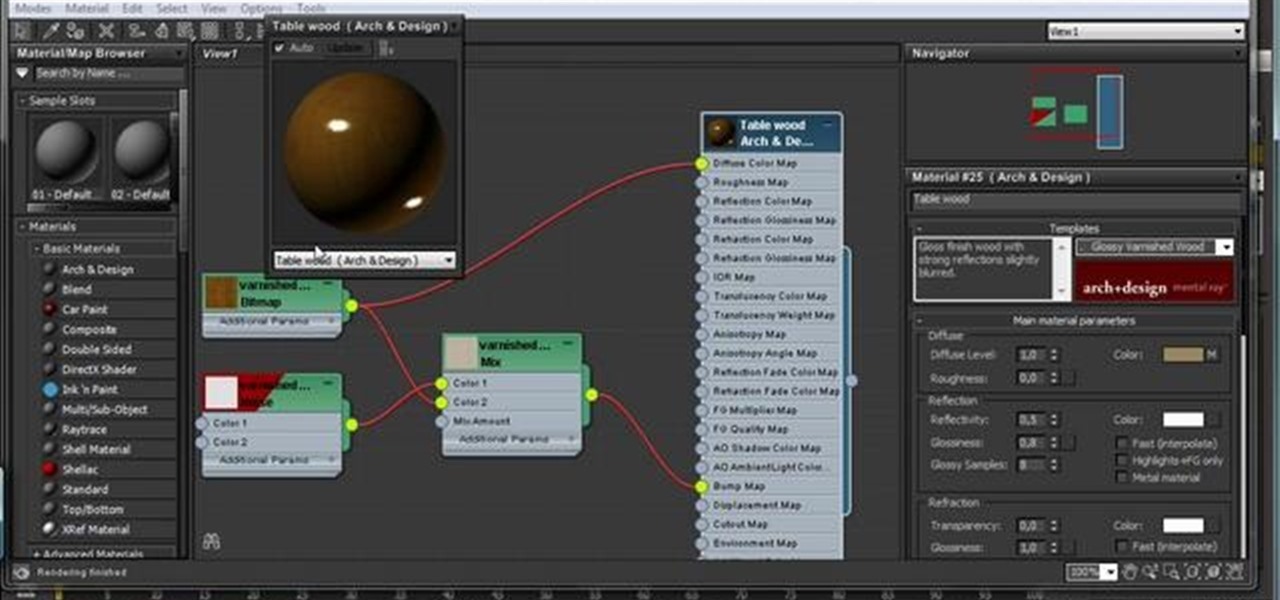
How To: Use and work with materials in Autodesk 3ds Max 2011
In this video tutorial, we learn how to use materials in Autodesk 3ds Max. Whether you're new to Autodesk's popular modeling software or a seasoned 3D artist just looking to better acquaint yourself with the 3ds Max 2011 workflow, you're sure to be well served by this video tutorial. For more information, and to get started using the lessons imparted by this free video software tutorial yourself, watch this free video guide.
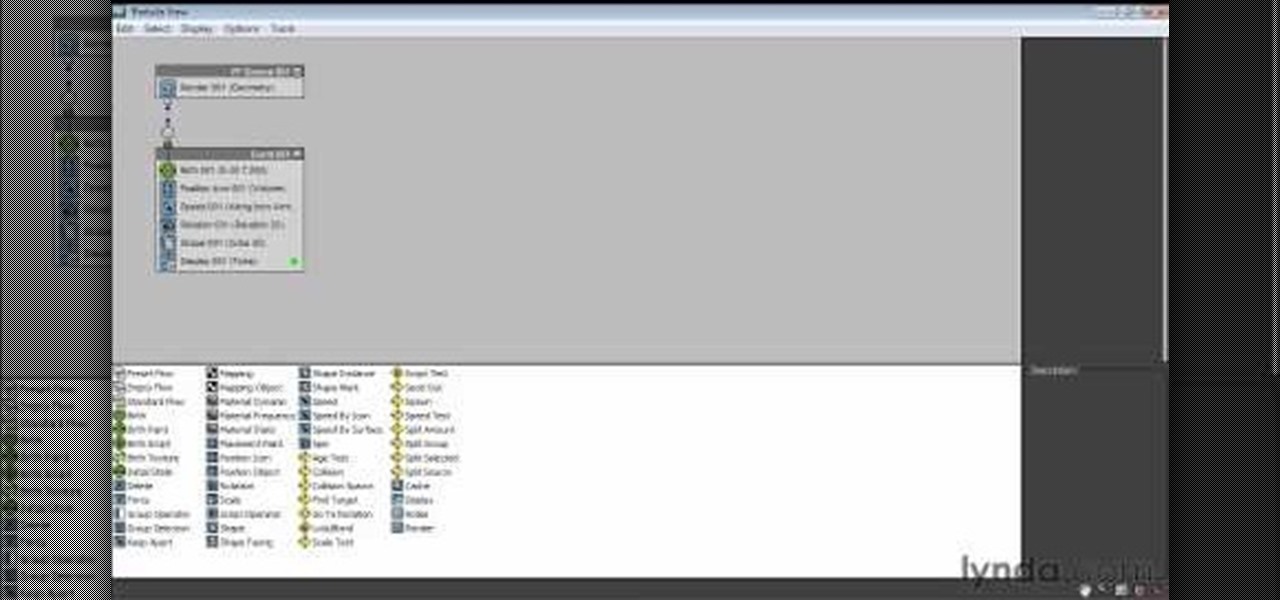
How To: Navigate the particle view interface in Autodesk 3ds Max 2011
In this video tutorial, we learn how to use the particle view in Autodesk 3ds Max. Whether you're new to Autodesk's popular modeling software or a seasoned 3D artist just looking to better acquaint yourself with the 3ds Max 2011 workflow, you're sure to be well served by this video tutorial. For more information, and to get started using the lessons imparted by this free video software tutorial yourself, watch this free video guide.
How To: Work with particle flow in Autodesk 3ds Max 2011
In this video tutorial, we learn how to work with particle flow in Autodesk 3ds Max 2011. Whether you're new to Autodesk's popular modeling software or a seasoned 3D artist just looking to better acquaint yourself with the 3ds Max 2011 workflow, you're sure to be well served by this video tutorial. For more information, and to get started using the lessons imparted by this free video software tutorial yourself, watch this free video guide.
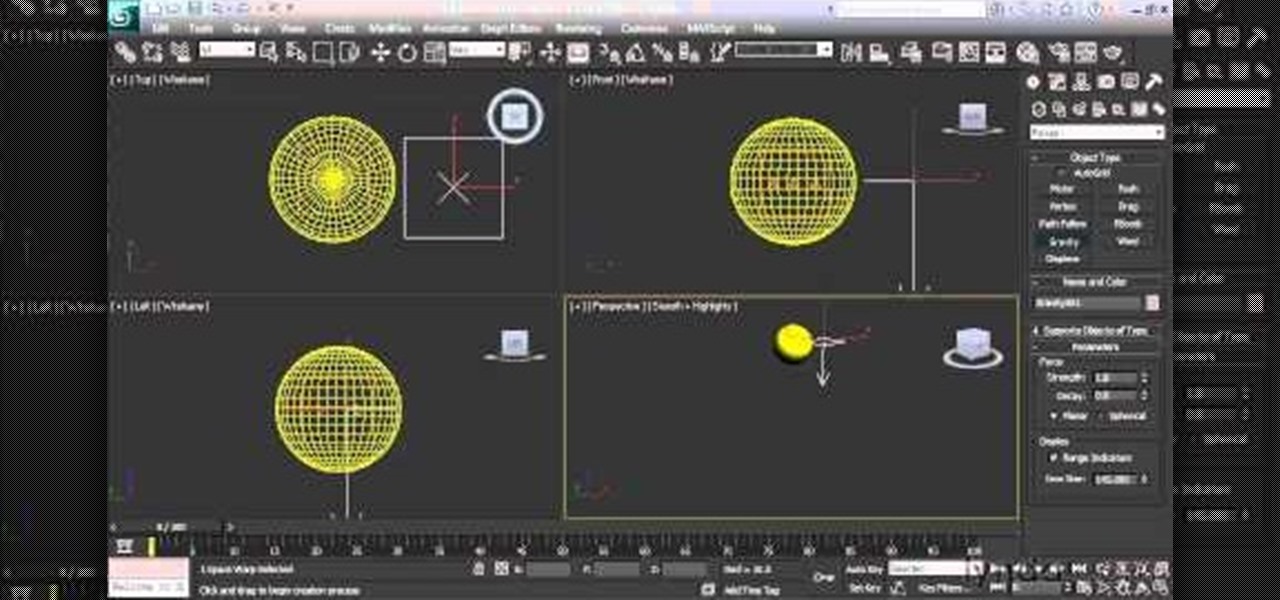
How To: Use a scene object as a particle Autodesk 3ds Max 2011
In this video tutorial, we learn how to use a scene object as a particle in Autodesk 3ds Max. Whether you're new to Autodesk's popular modeling software or a seasoned 3D artist just looking to better acquaint yourself with the 3ds Max 2011 workflow, you're sure to be well served by this video tutorial. For more information, and to get started using the lessons imparted by this free video software tutorial yourself, watch this free video guide.

How To: Work with the particle system in Autodesk 3ds Max 2011
In this video tutorial, we learn how to work with the particle system in 3ds Max 2011. Whether you're new to Autodesk's popular modeling software or a seasoned 3D artist just looking to better acquaint yourself with the 3ds Max 2011 workflow, you're sure to be well served by this video tutorial. For more information, and to get started using the lessons imparted by this free video software tutorial yourself, watch this free video guide.

How To: Sculpt polygon hair when modeling a character in Autodesk 3ds Max
In this video tutorial, we learn how to generate a model of a head and neck in 3ds Max. Whether you're new to Autodesk's popular modeling software or a seasoned 3D artist just looking to better acquaint yourself with the 3ds Max 2011 workflow, you're sure to be well served by this video tutorial. For more information, and to get started using the lessons imparted by this free video software tutorial yourself, watch this free video guide.
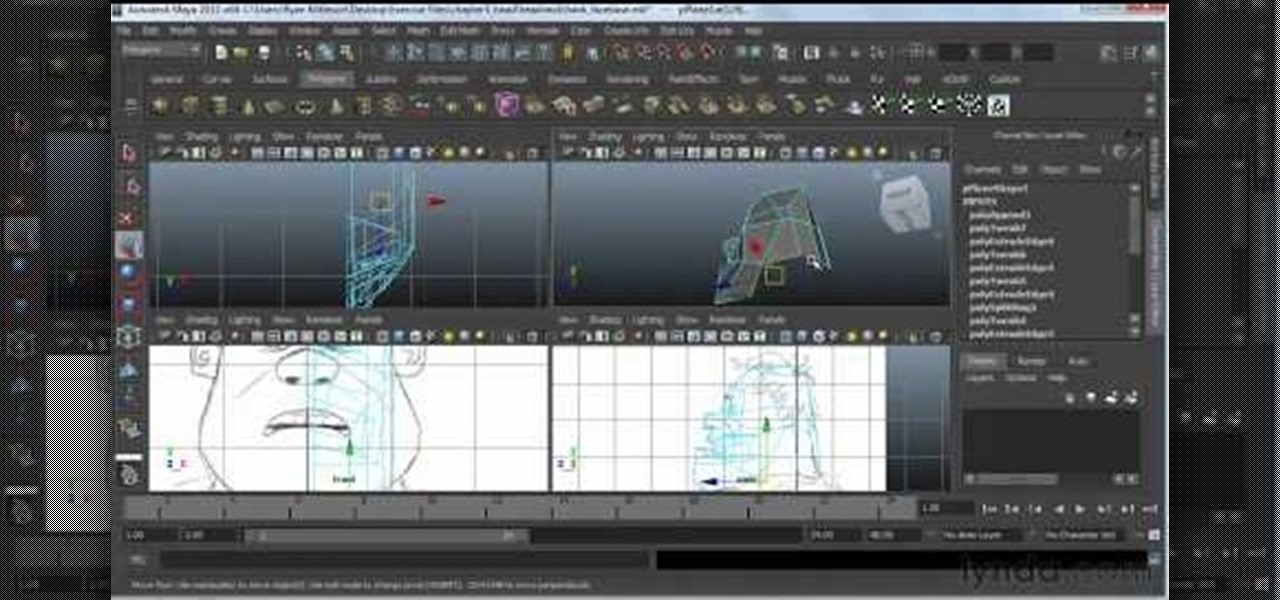
How To: Model a head and neck in Autodesk 3ds Max 2011
In this video tutorial, we learn how to generate a model of a head and neck in 3ds Max. Whether you're new to Autodesk's popular modeling software or a seasoned 3D artist just looking to better acquaint yourself with the 3ds Max 2011 workflow, you're sure to be well served by this video tutorial. For more information, and to get started using the lessons imparted by this free video software tutorial yourself, watch this free video guide.
Next Page
Prev Page